How to Rig the Split Mainsheet and Augie Equalizer
By Carol Cronin (photo courtesy of Fried Elliott) John Gatewood asked us the following rigging question a few months ago, and now that the sailing season is winding down we finally have a chance to answer: I have almost restored an old Snipe and am in process of rigging. I bought a split mainsheet from APS but am not sure they gave me instructions on how to rig it. I followed the Harken diagram but my boat has blocks under the deck which look like the ones in their reference photos on the APS website. There must be something more to do than tie the ends to a steel plate that is running to the double bullet block located in the middle of the aft cockpit coaming. Can someone tell me the proper way to rig the split mainsheet and how to rig the Augie Equalizer. ...

By Carol Cronin (photo courtesy of Fried Elliott) – originally published on October 20, 2014
John Gatewood asked us the following rigging question a few months ago, and now that the sailing season is winding down we finally have a chance to answer:
I have almost restored an old Snipe and am in process of rigging. I bought a split mainsheet from APS but am not sure they gave me instructions on how to rig it. I followed the Harken diagram but my boat has blocks under the deck which look like the ones in their reference photos on the APS website. There must be something more to do than tie the ends to a steel plate that is running to the double bullet block located in the middle of the aft cockpit coaming. Can someone tell me the proper way to rig the split mainsheet and how to rig the Augie Equalizer.
…
John,
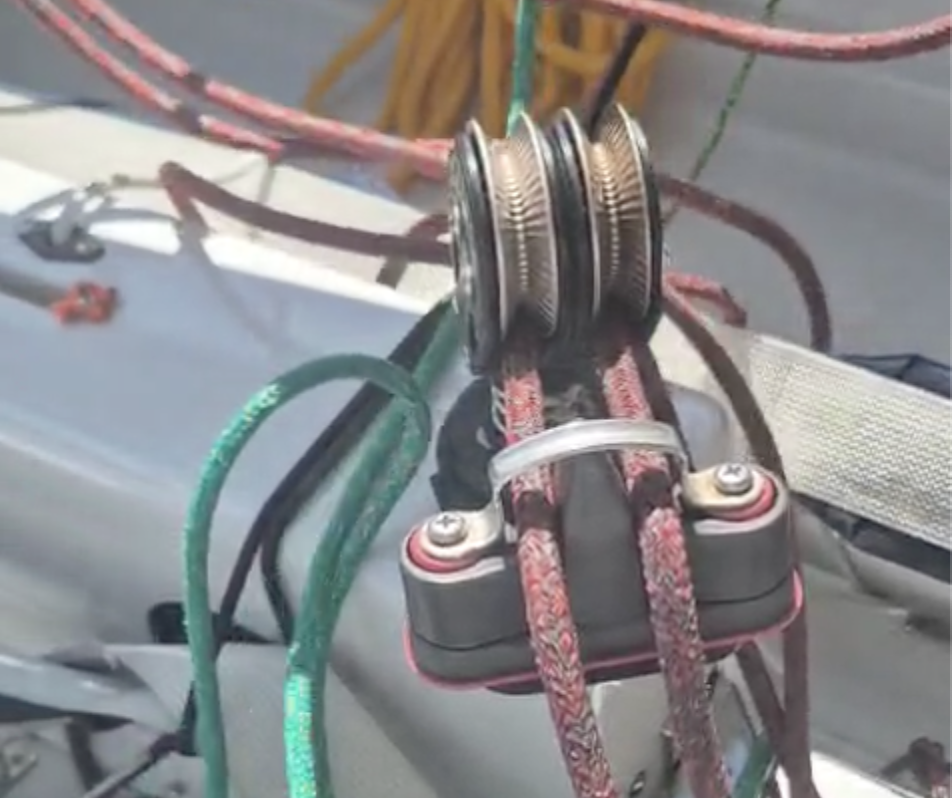
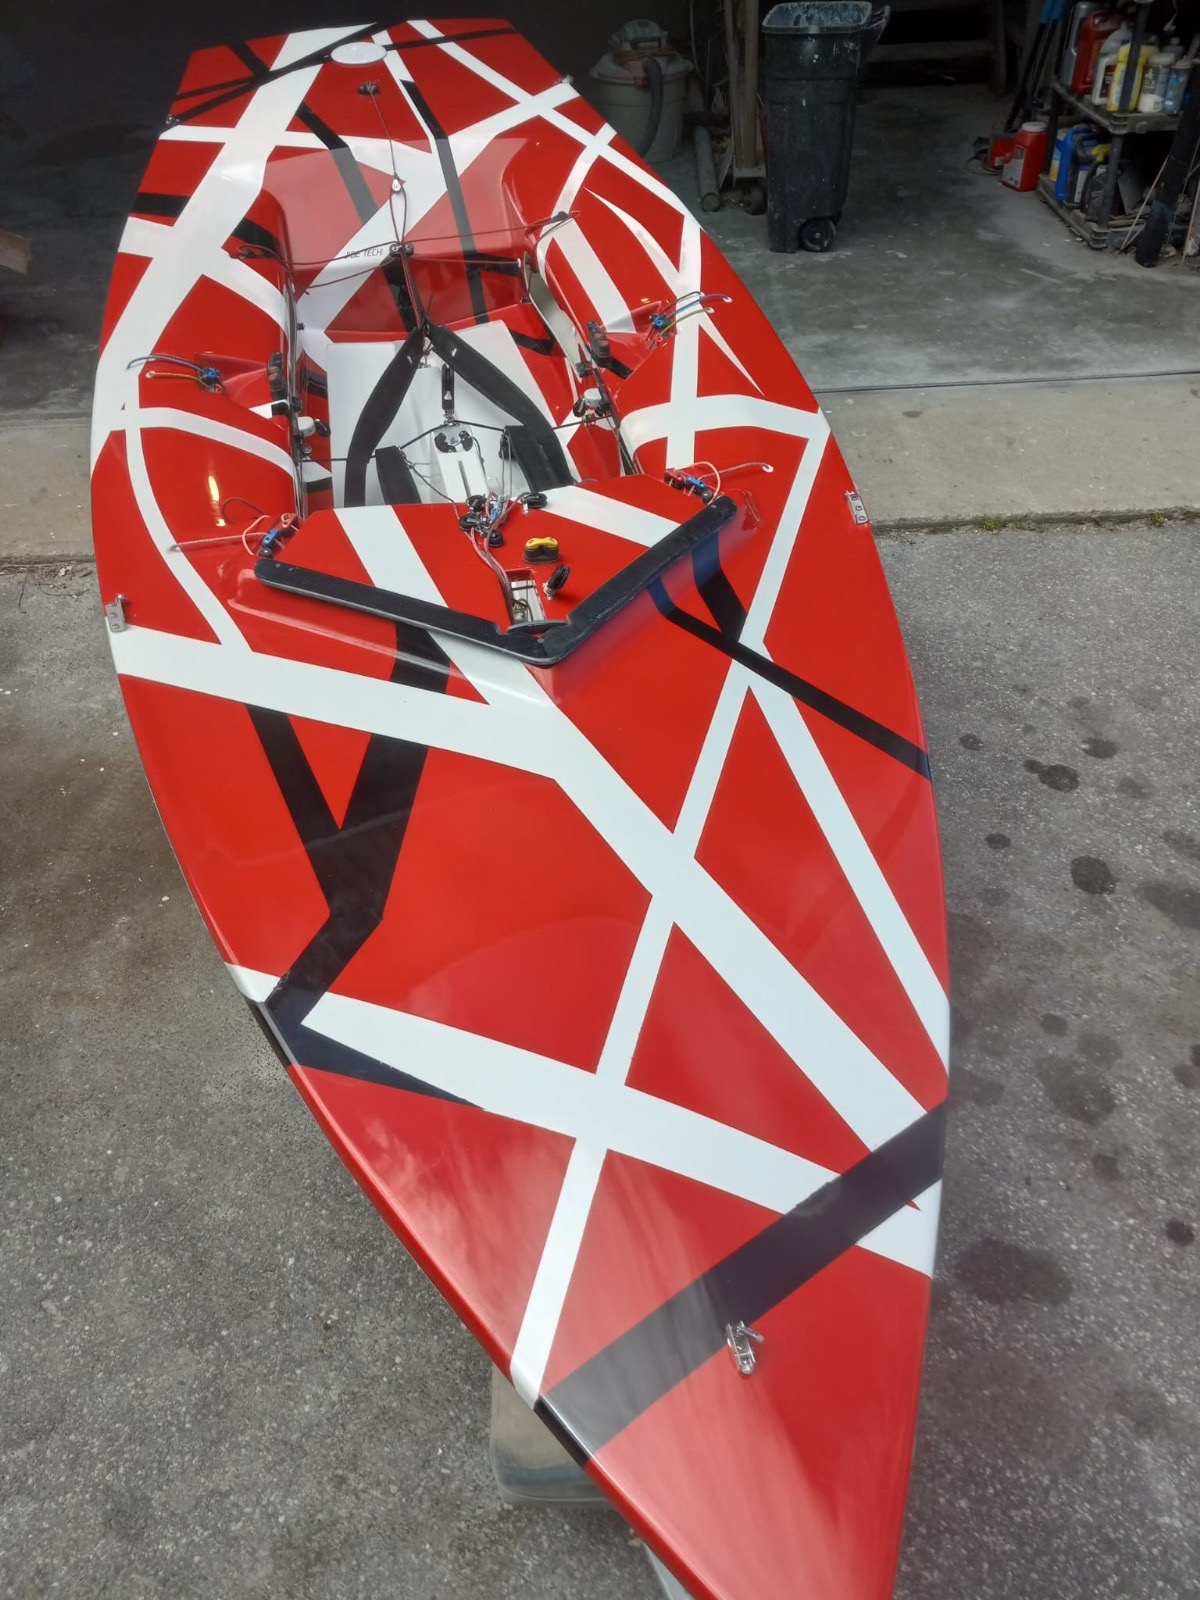
Here’s a photo of how the mainsheet is rigged on a 2010 Jibetech. You don’t specify what kind of boat you’re restoring, but the basic goals of rigging the split mainsheet and Augie are the same regardless (it’s just the details that are different):
Goal 1 (split mainsheet): Be able to drop the traveler to leeward when overpowered (White arrows/boxes)
On this Jibetech, the tails of the mainsheet are tied to a single line that runs down the center of the aft bulkhead. Make sure the tails are tied evenly so the traveler is the same length on both tacks.
The single line passes through a block and then is tied to port and starboard tails (white) so that it is adjustable on both tacks. The adjustment is the aft-most line in the skipper’s tray of lines.
Goal 2 (Adjustable traveler, aka Augie Equalizer): be able to pull the boom to windward for light air. (Yellow arrows/boxes)
Thin spectra is tied around the traveler lying on the aft deck and then run forward, passing under the deck and reappearing just below the mainsheet cleat. On this boat the crew adjusts the AE, so a small AE cam cleat was added a few years after this photo was taken on the vertical face of the deck, just below the AE exit.
Most boats are rigged to achieve goal 1. Some are rigged to also achieve goal 2.
Peter Commette adds the following detail:
[For cleating the AE] a cam cleat works best. It should be mounted on its side so that the A/E line does not re-cleat itself. For the Persson that means to mount the camcleat on the vertical side of the deck where it rolls into the cockpit. I like that cleat toward the aft side of the cockpit, so that I can reach it when I am sitting in. Some like the cleat mounted as the aft cleat in the recess on the deck in between skipper and crew, but that makes it harder to pull on in light air when sitting in, and you still have the problem of it recleating after release. The line should be continuous, so it can be uncleated from the leeward side.
There are more photos of Jibetech deck layouts in the Jibetech photo gallery:
http://photos.friedbits.com/2010jibetechsnipe/h2470e6e6#h2470e6e6
Comments for this post are closed


0 comments