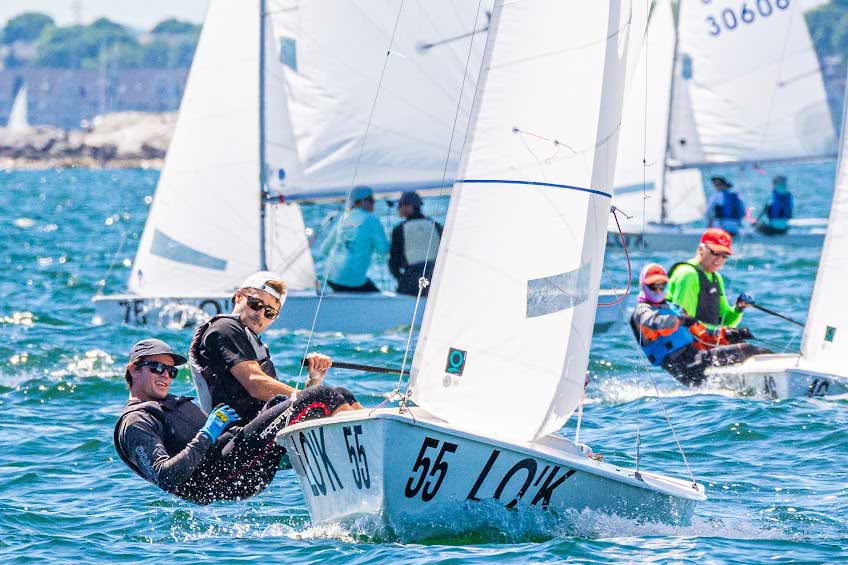
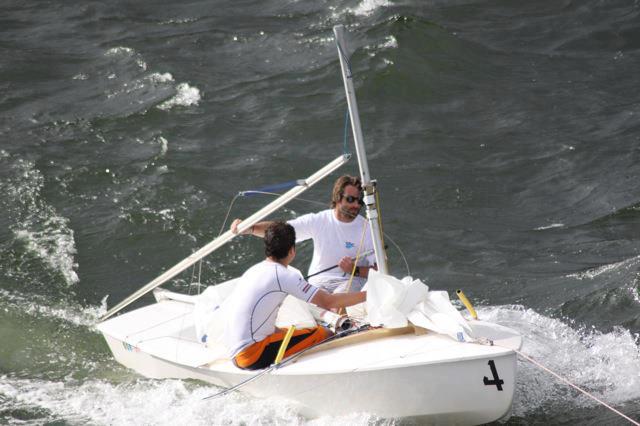
Preparing and Sailing a Snipe
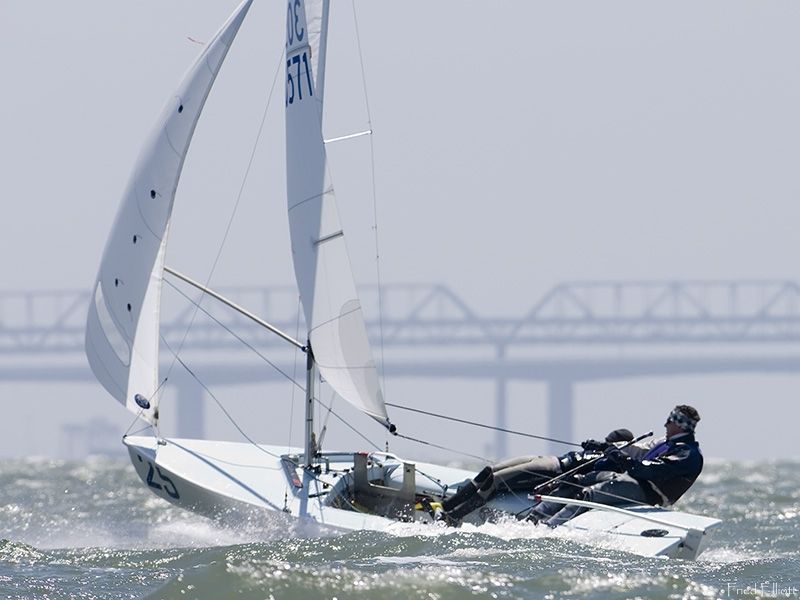
[caption id="attachment_9018" align="alignnone" width=""]http://www.friedbits.com/[/caption]By: Peter Commette(This article is adapted from another written by someone else, who wishes not to be mentioned.) Boat Design When speed sailing in a straight line, all Jibe Tech Snipes built after summer 2006 (30571 or higher number) and all Persson or Persson-like Snipes, regardless of year, are basically created equal. Because of this, a used Snipe is an excellent way to get into the class. Before purchasing any used boat there are a couple of things to check. First, weigh the boat. It may have corrector weights that can be removed to make it minimum weight. Second, check the mast. The Sidewinder Gold is the standard. (photo courtesy of Fried Elliott http://www.friedbits.com/) ...
By: Peter Commette
(This article is adapted from another written by someone else, who wishes not to be mentioned.)
Boat Design
When speed sailing in a straight line, all Jibe Tech Snipes built after summer 2006 (30571 or higher number) and all Persson or Persson-like Snipes, regardless of year, are basically created equal. Because of this, a used Snipe is an excellent way to get into the class.
Before purchasing any used boat there are a couple of things to check. First, weigh the boat. It may have corrector weights that can be removed to make it minimum weight. Second, check the mast. The Sidewinder Gold is the standard.
(photo courtesy of Fried Elliott http://www.friedbits.com/)
…
Boat Preparation
Hull: After purchasing your Snipe, I recommend taking your boat to a professional to have it faired every four years of so. Fiberglass boats shrink as they age, and a fairing job is the only way to maintain the hull in top form. When fairing, carry the round on the chines to the maximum width; from the maximum width back, sharpen the chine to the transom; sharpen the transom on the bottom and all the way up the sides. After that, just use soap and water to keep it clean. Hullkote works well, too.
The Snipe Class has a moment-of-inertia test to control the weight in the ends of the boat. The builders install corrector weights under the fore- and afterdecks, because that’s the quickest way to meet the “swing” test. However, I prefer to concentrate the correctors together, aft of the skipper. This will allow you to slide the boat forward on the jig, until it just passes the test.
Blades: A good rudder is minimum weight (6 pounds), max width, with the max width at about 35% back, and a sharp trailing edge. Don’t ruin your light rudder with a heavy tiller or hiking stick.
The daggerboard is fairly straight forward. It should be chocked so it is all the way aft in its trunk and tight side to side.
Check your board with a straight edge to make sure it’s absolutely flat. The aluminum plate is rolled, so it has a slight curve. You can straighten the board by placing it across two supports and jumping on it.
The trend in leading-edge shape of these aluminum plates has evolved to a parabolic tip that gradually tapers into the board using all of the 1″ bevel allowed.
The trailing edge will hum if its taper is too abrupt. It is important to use the full 1″ width of the allowed taper to fair in the edges gradually. The trailing edge should be as sharp as possible. The bottom of the board should be tapered as well, to a chisel point or a parabolic leading edge shape.
Most boards come with a cut-out which can reduce the weight by as much as 5 lbs. If you sail with a very strong crew, you can “cheat” the MOI test with a non-cut out board.
Masts: Getting the rig right is the most important thing you can do for speed in a Snipe. The first step is to find a good mast. As a general rule, bendier masts are better than stiff ones.
Bendy masts are good for two reasons. First, The Snipe is very sensitive to mainsheet tension. A bendy mast gives the mainsheet a lot of range of adjustment, which makes trimming less critical in medium air. It also makes it easier to prebend in light air.
The second reason has to do with how the Snipe Class measures masts. You can trick the moment of inertial test by bringing an underweight mast up to weight with an internal sleeve or web at spreader height.
Although bendier masts are better than stiff ones, the Proctor Miracle and the Sidewinder Junior and Black go too far. The Sidewinder Gold is the best.
If your mast is too stiff, don’t abandon it. First, cut out the external sail-track web that reinforces the mast below the gooseneck. This allows the mast to bend down low. If you have the old Sidewinder Standard, cutting the web will make it like a Sidewinder Gold.
Second, look up the sail track; see if the taper at the tip deflects forward. If yes, bend it straight.
Third, cut the butt of the mast so the aft edge is 3/16″ longer than the front edge. This compresses the back of the mast and forces it to bend forward.
Fourth, raise your shrouds to maximum height on the mast. This separates them from the headstay and also forces more bend into the spar.
Fifth, make sure that your main halyard locks exactly at the maximum height. The higher the mainsail the more leverage the leech has to bend the mast.
Finally, consider moving the spreader bracket down the mast a little.
Spreader Angle, Length and Chainplate Position: This is a critical adjustment for the Snipe. It’s different for every mast, boat, and crew weight. Finding your “magic” setting often requires a bit of experimentation.
To determine the proper length and angle, first you need to consider where your shrouds are positioned on the deck. This is different for every builder. The trend has been to move the shrouds as far forward and outboard as is legally allowed (60″ behind stem). The Jibe Techs after 2006 (30571 or higher number) and the Perssons are pretty much the same. The more forward your chain plates, the wider spreader angle you need; and the more outboard your chainplates, the more spreader length.
Also consider both the type of mast and the weight of the crew. Bendier masts must be “powered up” with longer, less-swept spreaders. Stiffer masts are depowered by shorter spreaders with more aft sweep. Remember, masts from the same manufacturer can vary up to 7 percent in weight, so don’t copy your neighbor’s settings just because he has the same model as you.
The heavier, more athletic the crew, the more power you tune into the rig with spreader length and angle. Spreader length is measured with spreaders locked aft. The average-weight crew, sighting up the sail track when sailing upwind in moderate conditions, wants to see a mast that is straight sideways. A lighter team would be looking for about 1/4″ of bend to weather at the spreaders; a heavyweight crew wants about 1/4″ to leeward. This 1/2″ range in side bend translates into a 1/2″ difference in spreader lengths. Length is measured from the shroud through the spreader bracket pin to the mast, under the spreader.
To determine the correct amount of spreader angle, or sweep, take a look at how the mainsail sets in heavy air with the vang on hard. In these conditions you will get “overbend wrinkles” from excessive mast bend. These wrinkles run from the clew to the lower half of the mast. By pulling on the mast aft lever, you should be able to remove all of these wrinkles. If you still have overbend wrinkles in the spreader area, you need to widen the spreader angle.
Hiking Straps: The crew’s straps must be far enough away from center line and angled out, so that the crew can quickly get his or her feet under them.
Skipper’s Straps. When reaching in planing conditions, the crew moves aft to the skipper’s straps, and the skipper moves aft and tightens up his hiking straps or uses a single, short reaching strap that is just tight enough so he or she can’t be “fire hosed” out of the boat.
When running in surfing or planing conditions it is nice, but not essential, that the skipper have sailboard-style foot straps mounted on the floor in front of the reaching strap. Then he can lock his feet to the floor, and slide in and out to help balance the boat without tugging on the tiller or mainsheet.
Jib sheeting: Most boats still are rigged for facing aft. The advantage to facing aft is it gives you better balance when tacking in big seas, because you don’t have to duck under the vang.
Some have simple cleats mounted on cars that are pinned to adjustable tracks. This works well. Another trimming system that has become popular is to use a twing on the jib sheet to adjust the for-and-aft lead upwind. This twing is led to the crew on the weather side. The twing deflects the sheet down and inboard.
Some of the top crews trim the jib straight from ratchet block, but this is not practical for a crew under 130 pounds because the pull is too hard. Even with a ratchet, you still need some sort of cleat, accessible to both skipper and crew, for cleating the pole off the wind.
Pole Launcher: By pulling on the launcher line, the jib clew is pulled to the pole end, and the inboard end of the pole is then launched from the end of the boom toward the mast. Make sure that the block on the mast is at least 1″ above the gooseneck and that it floats back enough so that the rope bearing point is behind the widest part of the mast. The turning block at the deck should be behind the widest part of the mast when the mast is at its neutral or base position.
Control Lines: I lead the jib Cunningham, as well as the jib leads, the mast aft, the mast forward, and the boomvang to the crew on the deck. In the deck recess between the skipper and crew are the main cunnigham and traveler.
The jib halyard exits from the daggerboard trunk, and is angled or swivels for easy cleating from the rail. It needs to have at least 15″ to 18″ or more of throw, so the jib can be flown out and away from the boat on a run. Most sailors use anywhere from a 6:1 to 12:1 cascade inside the trunk. The 6:1 works about as well as the 12:1 with less tail to pull.
The split-mainsheet system is the class standard. A rope bridle is sewn to the after end of the mainsheet, which is then trimmed inside the aft boom block when the mainsheet is trimmed hard. Except for very light air, no matter how hard you trim, the boom will remain centered until the bridle is “let down” with the traveler adjustment.
In practice, the split mainsheet’s 1:1 purchase is unmanageable for any skipper under 130 pounds in a strong breeze. For smaller skippers or consistent heavy-air conditions, a 2:1 mainsheet makes more sense.
The Augie Equalizer or “AE” attaches to the split tail as it runs along the deck from the outboard deck traveler blocks, one AE control line attaching on either side of the traveler center line piece. In very light air to light/medium air, by pulling the windward AE line, you can center the main and get more twist in the mainsail at the top than the split mainsheet would otherwise allow.
Tuning
Before the Mast Goes up
Make sure the mast is straight: Two saw horses are enough for mid-mast bends. You need to use a cantilever method for low mast bends.
Main halyard length: The shackle pin should lock 1/4″ lower than the bottom of the top mast band.
Spreader adjustment bolts: Start with making sure that the adjustment bolts extend the same distance in front of each spreader.
Stays and turnbuckles: 2.5 mm Dieform stays and Staymaster turnbuckles are the standard.
Length of spreaders: Limber Mast: 17 1/4″; Stiff Mast: 16 3/4″, measured from shroud through pin in bracket to side of mast on bottom of spreader. For boats with chain plates positioned at the maximum outboard location (like the Perssons and Jibe Techs after 30571) and sailed by an average-weight crew. If chain plates are mounted inboard, spreader length should be reduced accordingly. Heavy crews should add 1/4″ in spreader length, light crews should subtract 1/4″.
Tip to tip measurement: Limber Mast: 30 1/2″; Stiff Mast: 29″, measured from spreader tip to spreader tip. For boats with chain plates at the maximum forward position sailed by an average-weight crew. Reduce accordingly for boats with aft chain plates.
Last way to make sure that the spreaders are deflecting evenly before the mast goes up: Run shockcord from spreader tip to spreader tip. Sight the mast from the butt looking toward the shockcord. Put a level next to the butt of the mast and level the mast, so that its bolt rope side is pointing straight up. If the spreaders are even, the shockcord should look perfectly horizontal to you.
Jib trim mark on spreaders: Just as a reference, and not as a rule of trim, put contrasting tape or a magic marker line on the spreaders at 31 CM from the side of the mast. This is a good inside position. You will rarely trim inside of that mark, and many times you will trim at that mark or wider.
Mast butt or heel position: The mast butt should be max forward. The old standard was 60″ back from the stem. That 60″ rule is gone, with the only restriction now being the front end of the mast partner, which has been standardized by rule. For simplicity, for a Persson, we just measure from the front of the Persson boardwell; the same measurement of 60″ back from the stem is equal to 39 CM forward from the front of the boardwell. I sail at 40 CM…this week; most sail at 39 CM; some sail at 38 CM.
After Putting the Mast Up
Forestay length: I like my mast to stop at about 1″ forward of the aft part of the mast partner. Do not have forestay on for tuning or the stays will be too tight for tuning in the heavy air ranges. Attach a shockcord 12″-18″ up from the deck to keep the forestay from sagging into the jib upwind and interfering with the pole during jibes off the wind.
The mast partners: The partners should have about a 1/32″ of play on each side of the mast. This makes it easy to center the mast, and allows it to stay in column as the rig stretches upwind.
Put some tension on the forestay or on the jib halyard and look up the back of the mast; adjust the chocks on either side of the mast until the mast appears straight side to side.
Mast even side to side: Put pressure on the jib halyard, pull a tapemeasure to the top of the mast on your main halyard and lock it in place. Measure to your chainplate pin to make sure that the mast is not leaning one way or the other.
Equalize spreader back sweep: The last method for equalizing the spreader sweep is to cram on the jib halyard and/or to put on mast ram forward so that the spreaders lock. Stand off to the side of the boat about 20′ away or a little more. Look at the stay near you through to the stay on the other side of the boat. They should be perfectly in line.
Tune the mast: As per your sailmaker’s tuning guide. After you have the mast tuned at the standard rake that your sailmaker suggests, put a mark on each side of the mast with corresponding marks on the partner, the turnbuckles or Staymasters, and the jib halyard wire and mast. This is your “Neutral” or base position. The standard rake is for all-purpose, medium-air conditions.
General tuning notes: Make sure that your jib halyard, when it is pulled to base or neutral, has no more than one inch before it bottoms out. This allows the jib to fly out the farthest when you are off the wind, and it allows for a little tighter halyard if the wind comes up during a race. To accomplish this, you may need to add some line to the job halyard wire at the point where it attaches to the head of the jib.
Always attach the jib wire at the tack as far forward as possible.
In light air and slop, the jib halyard is eased as much as a half inch to straighten the mast and to make the jib fuller and easier to trim. In a breeze the turnbuckles or Staymasters are tightened to firm up the rig. Class rules prohibit adjustment of shrouds while racing, so that during a race, a little more jib halyard tension will take care of the jib sag induced by the extra breeze, or you may try dropping your traveler.
The mast lever or mast fore and aft control (also known as “mast ram”) is a critical adjustment. In very light air and chop, or in light air and flat water, it is used to add prebend, sometimes as much as 1/4″ to 1/2″. In choppy conditions or when vang sheeting, the ram is used to restrict bend. In heavy air upwind, the proportion of vang tension to ram aft is varied with sea conditions. For example, in rough seas, 1/4″ of added aft ram at deck level, with a corresponding ease of the vang, will give the mainsail more power and twist for better speed.
Mark everything, but here are the important ones: identify the cleats for the various control lines; mark on deck 7″ down on the traveler; mark mainsheet in a number of spots on either side of the upwind trim at the forward boom block; 88″, 89″, and 90″ marks on deck for jib leads (measured from the jib tack pin); numerous marks on the vang line on the static part of the vang system that doesn’t move; mark jib sheets in numerous places around where they trim at the ratchet; marks from 13″ to 18″ off centerline on the splashrails at each inch mark; mark with tape or a marker at 31 CM from mast on each spreader; mark, at the very least, the neutral settings for halyard, on the deck for the mast position in the partner, and Staymasters.
Sail Trim Upwind
Mainsheet: A good starting point for medium air is to trim the main until the upper batten is parallel to the boom, which usually is when the upper leech telltale starts to die. Trimming one or two ratchet clicks harder on your mainsheet is good for occasional pinching, and a similar ease on the sheet will allow you to foot.
In very light winds, the top batten will hook to weather due to the large roach of the sail and the weight of the boom. Adding 1/4″ to 1/2″ of forward mast lever will help alleviate this a little. In heavy air the upper batten will naturally angle out 10 degrees from parallel.
Watch the top leech telltale. For the most part, you want it to be on the edge of streaming/not streaming.
Traveler: Use it! In light air and flat water the traveler is centered. In light air and chop, drop the traveler down an inch or two and trim until the leech is firm. You can develop better footing power by dropping the traveler 1″ and sheeting one “click” harder on the mainsheet. This will give you some good power.
The traveler is an important control in medium air; reach for it first to depower when the wind builds from 10 to 15 knots. With the traveler down you can still sheet the main fairly hard to maintain mast bend and headstay tension. The traveler is dropped three to four inches before it’s time to rely on the vang to bend the mast. In heavy air, I will drop the traveler as much as 7″.
Boomvang: In winds of 0 to 14 knots, just take the slack out of the vang. That way, the vang will only have tension on it when the main is eased for footing, a puff or to work through a wave.
By the time the wind is 15 knots, it is usually puffy and choppy. In these conditions you have to be able to play the main in and out in large amounts. To do this you need to “lock in” the mast bend with the ram and with boomvang tension; otherwise the mast straightens and the main gets too full as you dump the mainsheet for footing, a puff or to work through a wave. You also have to “lock in” headstay sag, or the jib will balloon out to leeward and cause lee helm whenever you ease the mainsheet. This is done with the aft lever and the boomvang.
When the wind is in the 15 to 20 knot range, the primary power control is the boomvang. Maximum vang for fully overpowered conditions is almost, but not quite, enough to cause the mainsail to turn “inside out” from overbend wrinkles. When you have way over-vanged, you will have lee helm when you ease the main in a puff.
Jib Lead and Sheet Tension: The Snipe goes best when the jib lead seems unnaturally far forward and the sheet seems over-eased. The standard jib-lead positions for most jibs is about 7′ 4″(88″) – 7′ 6″(90″) aft of the jib tack (jib wire) fastening point in a straight line over the splashrails. 7’5″(89″) is a good, safe starting point. As the wind comes up, let the lead out as much as 3″ in a lot of wind. In extremely light air, sometimes you can let the lead out about 3″ to trim wide without the sail “cupping.”
Once in a while in extreme light air, good speed can be achieved with moving the leads all the way aft and easing the twing to flatten out the jib, open the leech. You would think this is the “trimming wide” that you want in light air to keep the boat moving forward, especially in a chop, but you will be surprised to see that the intersection of the jib and the splashrail indicates that you are not trimming that wide, so that you have a nice combination of the sail having a nice shape and not having to sail too low to achieve it, while the jib has a nice open shape that keeps you moving forward.
Sheet tension is far more important than lead position. Snipe sailors measure tension by marking the foot of the jib where the vertical plane of the sail lands on the splash rail or the deck the maximum tension mark is made 15″-16″ off the centerline on each side of the mast, with the mast set in its “neutral position.” Only in medium air and flat water is the jib trimmed this hard. In choppy conditions it is eased 1″ or 2″ outside this mark and further out in big breeze. Maximum ease is fast also when it’s light and sloppy. Watch the leech telltale; if it dies, ease. Unlike the main, you never want it overtrimmed at any time. A majority of speed problems is caused by overtrimming the jib. If you feel slow, ease the jib and foot.
Sail Trim Off Wind:
Pin the spreaders so that they do not go forward of right angles in a good breeze, which will keep the mast from inverting off the wind and will allow you to carry your mast further back off the wind in a more powered up setting. Unpin in lighter to moderate breeze, so the boom can go out further.
Reaching: Despite its weight, the Snipe planes easily. Because the hull has a lot of rocker, it is very sensitive to fore-and-aft weight positioning. On a planing reach, the skipper slides aft and lock his feet into the reaching strap while the crew has the whole cockpit and must use it to full advantage. The goal is to keep the boat absolutely level, both side to side and on its fore-and-aft lines. When the stern lifts as a wave or puff hits, the crew slides aft and hikes on the skipper’s upwind straps to keep the bow from digging in. The bow lifts as soon as the boat is planing, so the crew slides in and forward to the front of the cockpit to keep the boat on its lines. This for-and-aft movement is not ooching if you don’t stop abruptly, push, or grab the deck. Holding the pole line aft of the cleat helps the crew move around the boat. Skipper and crew should hike with their bodies angled back at 45 degrees to centerline.
The daggerboard is always raised to full legal height off the wind, except when the pole reach is tight, or you are in displacement jib reaching; in both instances, it’s set three inches lower.
The use of aft-mast ram is critical to off wind speed. The farther aft you pull the mast, the straighter and more powerful the mainsail. If you pull too hard, however, the mast will reverse and take a permanent bend. In heavy air, always have the mast set at, or forward of the neutral position, especially when reaching with the pole up.
The jib halyard is eased slightly when jib reaching (1″), except in heavy air. When pole reaching the halyard is eased about 6″-8″, less if it’s a tight reach. A reaching hook for the weather sheet helps keep the pole from skying on a reach.
Most sailors know enough to trim the pole back as he wind goes aft, but you also have to either ease the halyard or retract the pole launcher a few inches, or the jib will be stretched tight and won’t fly properly. The reverse is true as you let the pole forward; either make the pole longer or tighten the halyard.
Running: In light air, a Snipe sails like a spinnaker boat. The pole is long, the jib is light and flies well away from the boat and to keep the jib flying you have to sail fairly tight jibing angles. Tactically it’s just as challenging as sailing with a spinnaker.
As you enter a lull, heel the boat onto its leeward chine, let the pole forward, and tighten the jib halyard. In a puff, shift your weight so the boat rolls onto its weather chine. This gives you the lee helm necessary to carve the boat down in the puff. The pole should come back as the halyard is eased.
In moderate to heavy air, the boat is sailed level for better control. Here, working “deep” is not as important as shifting your weight to best ride the waves. Heeling to weather, pulling the mast back and easing the vang does allow you to sail deeper, but invites an inverted mast.
Sometime in a big sea, it is favorable to shorten the pole, so that it has less tendency to dip in the water. Bad things happen when the pole is dipped (break pole, invert mast, rip jib at the tack). The crew can solve the problem with a hand on the pole line behind the cleat; the crew uncleats the pole when it dips.
Setting the Pole on a Reach in a Breeze: For the lighter crew, technique is everything, and the skipper must help; it’s a two person maneuver. Many ways that work; this is the system I use: (1) sail high of rhumb line, get vang eased (if you forgot to ease it before you rounded the mark) and get board up; trim jib normally and sail fast; when skipper has boat moving and under control, skipper looks for being free of the fleet and a wave to ride down; (2) skipper bears off on wave and sails dead down wind; this makes it easy for crew to get the pole all the way out with the clew butted up against the pole; skipper trims the jib to reaching position, while crew puts windward sheet in reaching hook; (3) come up to course.
Sometimes in a breeze the clew does not butt up against the end of the pole because the wind gets in the jib before the crew can get the clew tight against the pole. If that happens, the skipper doesn’t need to panic. If it’s a matter of a foot or less, don’t ease the jib halyard; rather, get the boat going and wait for a lull or to be bearing off down a wave to fix. The way to fix the problem is to have the crew leave the pole line and jib sheet cleated, grab the pole and pull the pole back on the pole line in the direction of the mast.
Jibing the Pole: If on a reach, get the windward sheet out of the reaching hook first. The hardest jibe is from starboard to port, so I will address this: (1) Skipper trims leeward jib sheet hard and cleats it, so it’s partially trimmed for new jibe; (2) skipper overtrims mainsail to keep boom parallel to pole or the pole will get stuck in the triangular space formed by where the main bolt rope enters the boom, the tack, and the gooseneck, or it will get stuck in the vang where it attached to the boom or the forward mainsail block; (3) crew pulls pole line between cleat and block out to chainplate (length necessary to let the pole retract to a point just inside the jib wire and forestay); (4) crew places back hand (right hand on this jibe) at aft block clutching the pole line there and locks his hand in there so the hand does not move and accidently start trimming the line until ready (otherwise the pole won’t retract enough and will hang up on forestay); (5) crew’s forward hand (left on starboard jibe) uncleats the pole line and then grabs the vang and pulls the boom over while leaning over the top of the board to help the roll-jibe; (6) at same time, skipper yanks the windward jib sheet hard to keep the pole parallel to the boom and to help the shockcord retract the pole, while the skipper also is steering into the jibe; (7) as the boom passes over the head of the crew and is past centerline, the crew pulls up the pole on the new jibe. Big, long yanks on the line to set it; no baby yanks. If the pole does get caught in the boom, many times the only way to fix the problem is to jibe back and start over.
Dousing the Pole: Again, the hardest is a starboard rounding for the same reason that the starboard to port jibe is the hardest; the pole can get caught in so many areas caused by the pole failing to keep parallel to the boom. Many ways work; this is my method: (1) pull the pole back and overtrim the windward jib sheet; (2) if coming to the mark on a reach, get the pole out of the reaching hook; (3) the skipper pulls up the jib halyard while the crew shortens the pole a few inches, more in light air and less in heavy (in heavy air on a reach the pole does not need to be shortened); the object is to keep the pole parallel to the boom; (4) when the pole is retracted, the skipper overtrims the main, while the crew uncleats the pole and yanks hard on the windward jib sheet.
General Sail Fast Thoughts for All Boats
Placement of your body: In light air, try to center the weight as low in the boat as possible. In a hiking breeze do everything you can to get more leverage. Remember, you always will go faster if you hike harder, or do like I now do and get a crew that hikes real hard. Try to keep the skipper and crew’s weight together fore and aft.
Using your body, and using anything but your tiller to steer: Think of the rudder as a brake. Let’s go over the basics of cutting the umbilical cord to the rudder:
Trim main: boat heads up
Ease main: boat heads down
Trim jib: boat heads down
Ease jib: boat heads up
Raise board: boat heads down
Lower board: boat heads up
Pull on vang: boat heads up
Ease vang: boat heads off
Move forward: boat heads up
Move aft: boat heads off
Lean in: boat heads up
Lean out: boat heads down
Torque aft: boat heads up, but if you stay aft, the boat eventually will head down
Torque forward: boat heads down, but if you stay forward, the boat eventually will head up
In waves, use all the kinetics the rules allow. Slide aft before hitting a big wave or torque aft, and slide or torque forward at the crest. Unweight before a wave and hike hard on the crest. Slide forward as you come into the boat in a dying breeze. The goal is to keep the boat absolutely flat or at a constant heel
without rolling from side to side.
Good luck and smooth sailing!
Note:
Torquing is throwing the top part of your body (from rear end up) fore or aft and twisting the boat around a fulcrum, the board. Torquing works only in the moment, while all the other maneuvers rearrange the alignment of the center of effort and center of resistance, either fore and aft or side to side.
Comments for this post are closed


2 comments
Manuel Cabrera
Fantastica Web, solamente a falta de una mejor traducción al Español.
Muy buena para los que nos iniciamos (ya mayores) a la navegación con Snipe.
Muchas gracias por todo.
Saludos cordiales desde la Flota de Snipe de Valencia (España)
Leave a reply
Your email address will not be published. Your comment will be revised by the site if needed.
ALDO PELLICCIOTTI
Muito bom artigo!
Espero que ainda seja atual, Vou reiniciar tudo seguindo estas instruções
Leave a reply
Your email address will not be published. Your comment will be revised by the site if needed.